最近做项目,需要展示一个事件的发展历程,于是用到了 TimelineJs 这个东西,效果还不错,于是拿出来与大家分享下!
- 先下载资源包,上面TimelineJs 已经提供了GitHub的源地址 https://github.com/NUKnightLab/TimelineJS
新建页面,引入相关的文件,然后初始化代码
1
2
3
4
5
6
7
8
9
10
11
12
13
14
15
16
17
18
19
20
21
22
23
24
25
26
27
28
29
30
31<html>
<head runat="server">
<title>时间轴插件--展示</title>
<meta name="viewport" content="width=device-width, initial-scale=1.0, maximum-scale=1.0" />
<!-- HTML5 shim, for IE6-8 support of HTML elements-->
<!--[if lt IE 9]>
<script src="http://html5shim.googlecode.com/svn/trunk/html5.js"></script><![endif]-->
</head>
<body>
<form id="form1" runat="server">
<div>
<div id="timeline-embed">
</div>
<script type="text/javascript" src="/js/storyjs-embed.js"></script>
<script type="text/javascript">
function InitTimeline() {
createStoryJS({
type: 'timeline',
width: '100%',
height: "100%",
lang: 'zh-cn',
source: 'example_json.json',
embed_id: 'timeline-embed'
});
}
InitTimeline();
</script>
</div>
</form>
</body>
</html>大功告成,可以查看效果了,哈哈(ps:一定要将对应的css和js文件放到指定的目录下,如果没有请参照下面这段代码初始化)
1
2
3
4
5
6
7
8
9
10
11
12
13<div id="timeline-embed"></div>
<script type="text/javascript">
var timeline_config = {
width: '100%',
height: '600',
source: 'path_to_json',//数据来源
embed_id: 'timeline-embed',//初始化的DOM ID
lang: 'zh-cn', //语言版本
css: 'path_to_css/timeline.css', //css路径
js: 'path_to_js/timeline-min.js' //js路径
}
</script>
<script type="text/javascript" src="/js/storyjs-embed.js"></script>
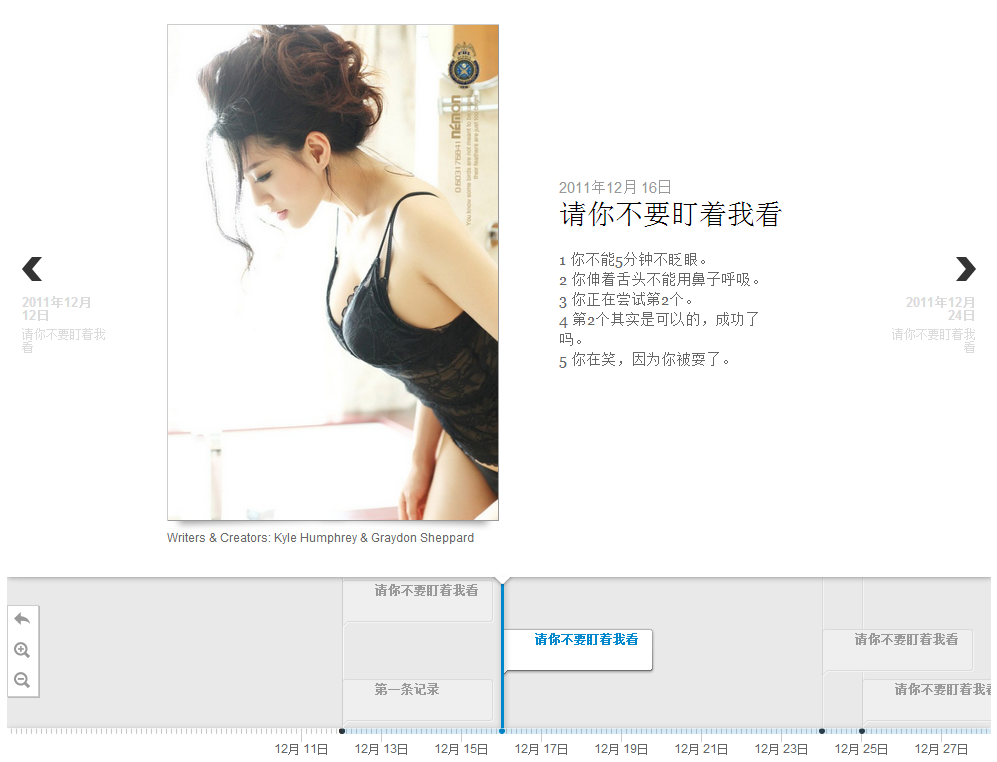
####最后来张效果图
下载地址:点击此处下载DEMO